How to Use and Read a Micrometer【0.01mm Measurement Explained with Diagrams】
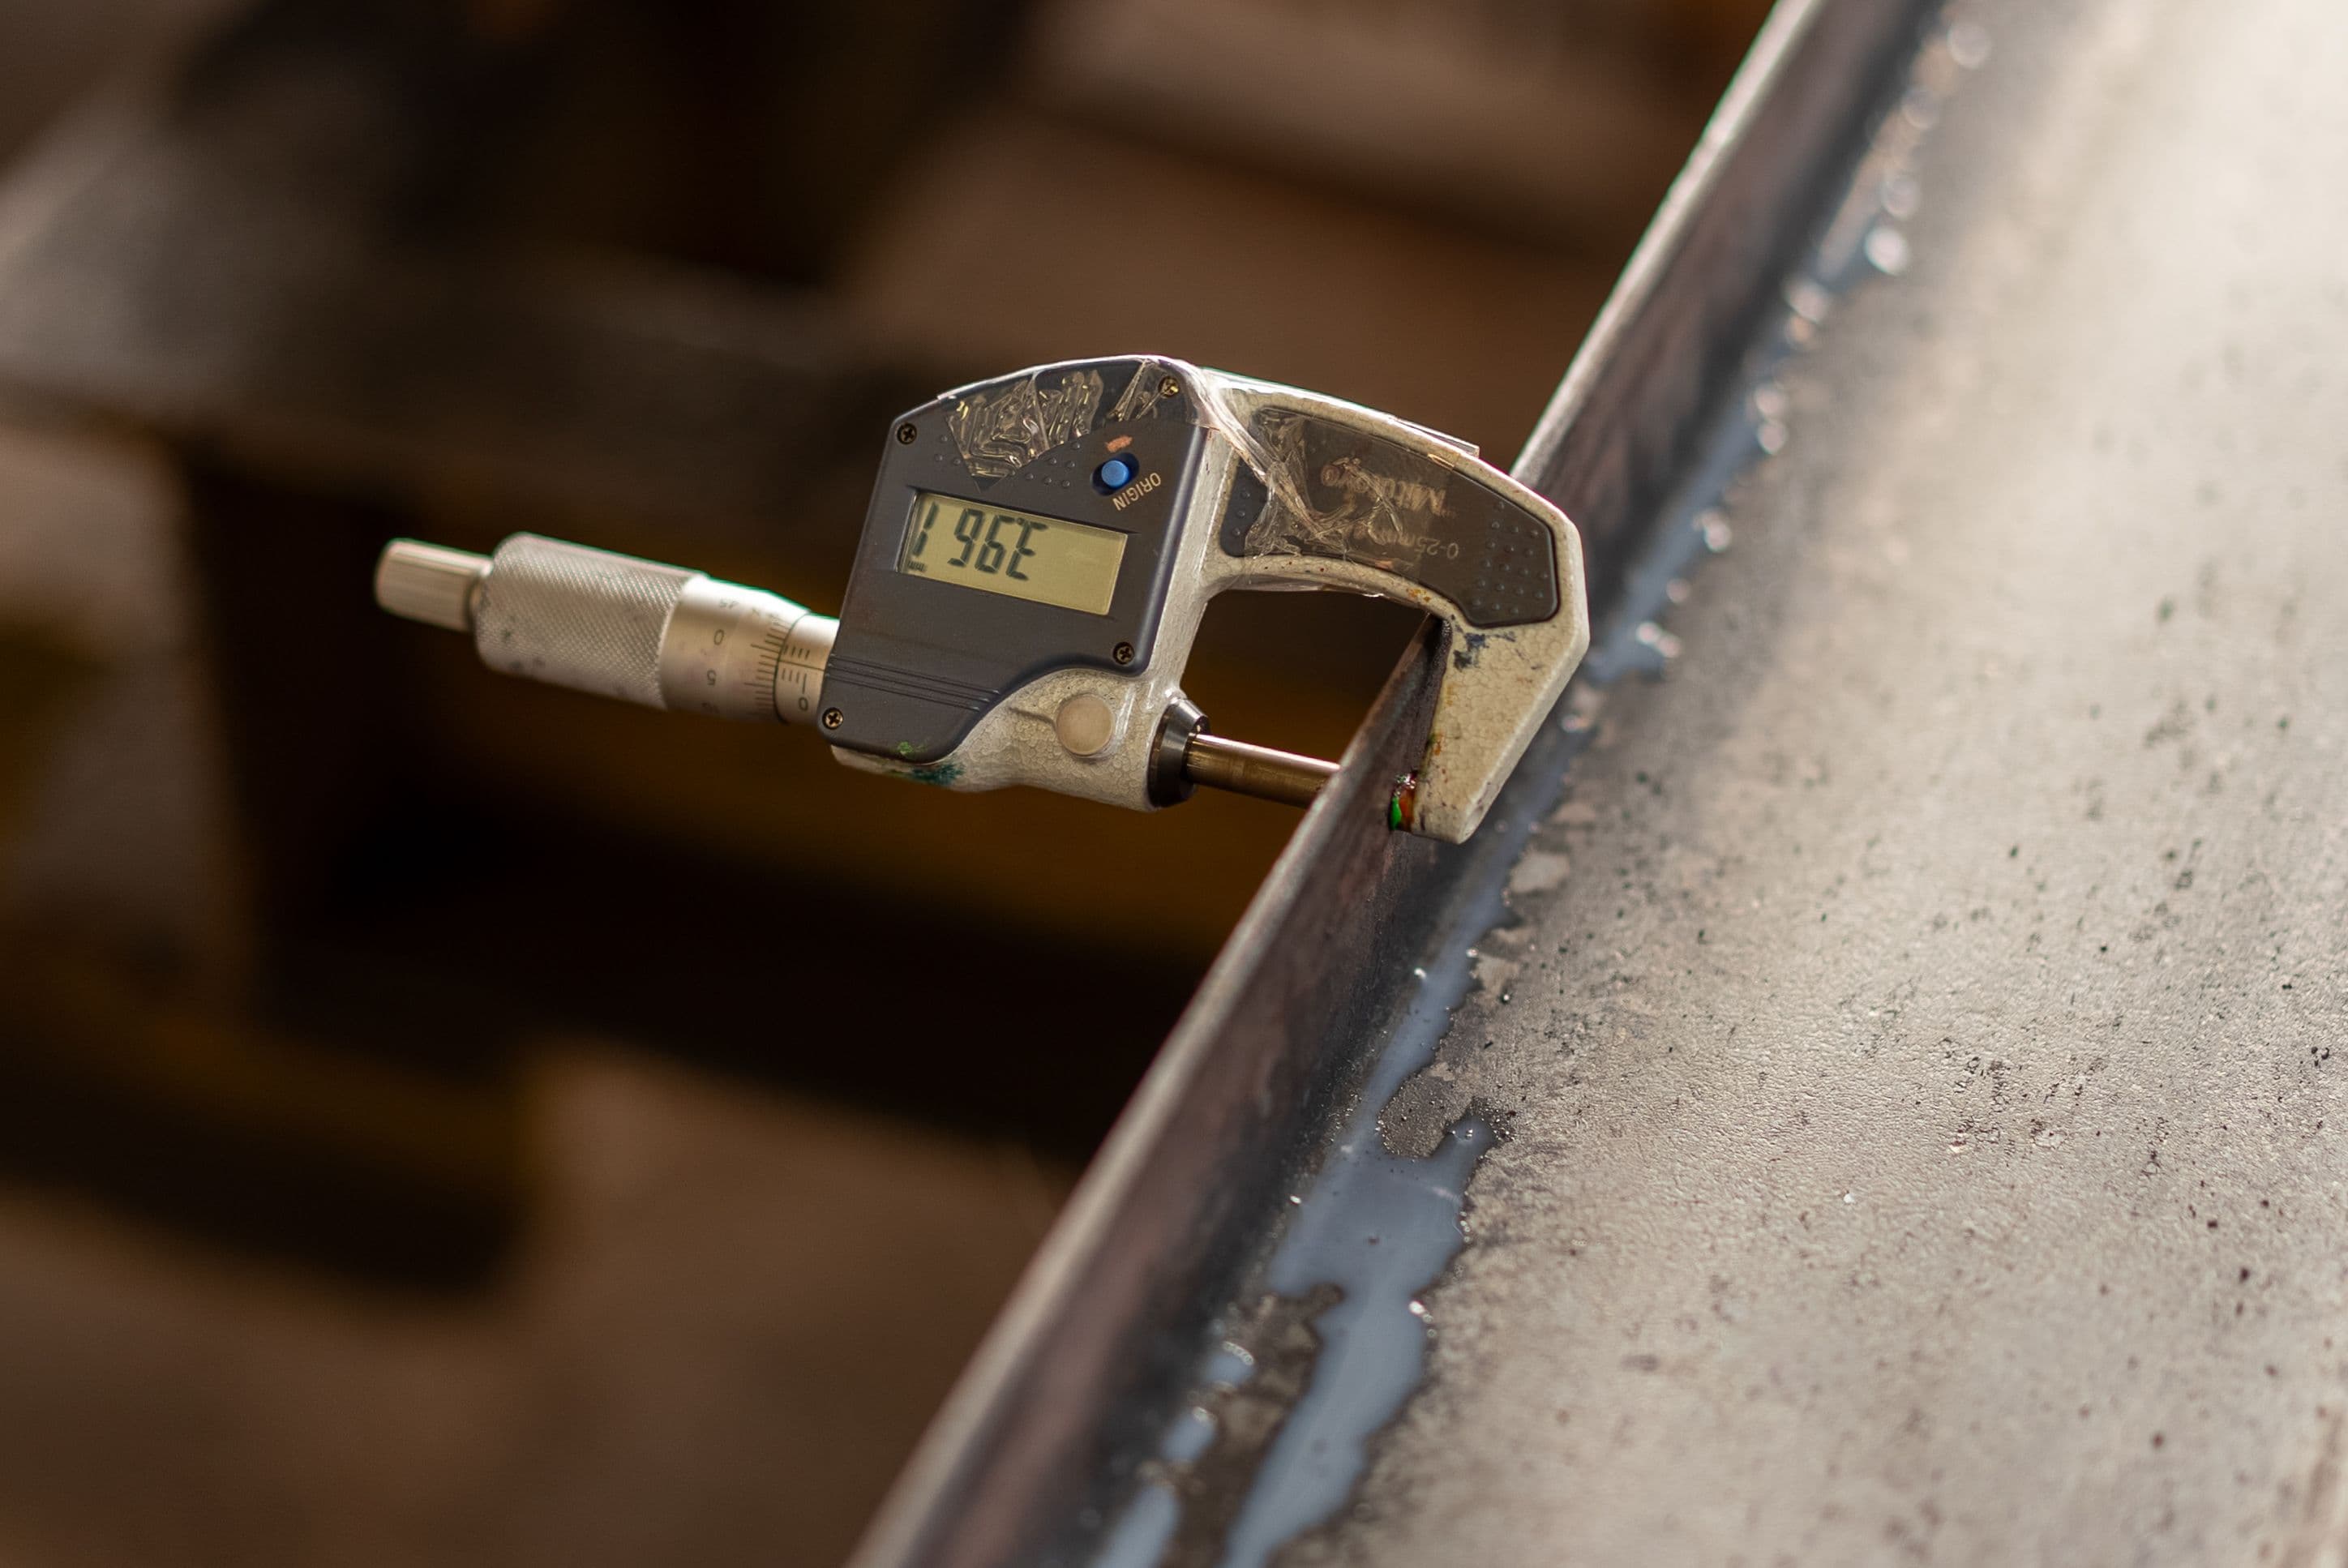
The micrometer uses a precision screw thread to measure to 0.01mm (0.001mm by estimation). Because its measuring axis is in line with its scale axis — satisfying the Abbe principle — it reads more accurately than a caliper. This guide covers part names, reading 0.01mm, the correct procedure, zero adjustment and error fixes — with diagrams.
Types of micrometer
- Outside micrometer: the most common; measures OD and thickness. Ranges are split in 25mm steps: 0–25, 25–50mm…
- Inside micrometer: bore and slot widths.
- Depth micrometer: depths and steps.
- Specialty forms exist for gear-tooth and screw-thread measurement.
Part names
- Frame: the C-shaped body that holds everything.
- Anvil / spindle: the fixed and moving measuring faces that grip the work.
- Sleeve: the main scale in 0.5mm graduations, with a reference line.
- Thimble: the sub-scale with 50 divisions (one turn = 0.5mm).
- Ratchet stop: applies a constant measuring force.
- Clamp: locks the spindle while you read.
Reading (0.01mm units)
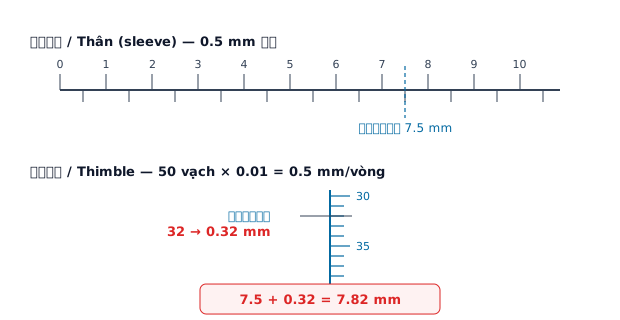
Fig. 1 — Two steps.
- Read the sleeve: read the sleeve graduation exposed by the reference line. The top row is 1mm, the bottom row is 0.5mm (here, 7.5mm).
- Read the thimble: the thimble graduation aligned with the reference line × 0.01 (here, 32 → 0.32mm).
- Add: 7.5 + 0.32 = 7.82mm.
Note that one thimble turn advances 0.5mm; it's easy to miss the 0.5mm mark on the sleeve's lower row.
Correct measuring procedure
- Wipe the measuring faces clean and check zero.
- Seat the work against the anvil and turn the thimble to close in.
- Always finish with the ratchet stop, "click-click" 2–3 times, for a constant force.
- If needed, use the clamp to lock, then read.
- Measure the same spot 2–3 times to confirm repeatability.
Zero adjustment
- 0–25mm: close the anvil and spindle directly and check zero. If off, adjust the sleeve with the supplied spanner.
- Above 25mm: use the supplied standard (setting) bar to set zero.
- To avoid thermal effects, let the faces and standard bar equalize at 20°C and don't grip them long with bare hands.
Common errors and fixes
| Cause | Symptom | Fix |
|---|---|---|
| Inconsistent force | Unstable reading | Always finish with the ratchet |
| Zero offset | Whole scale shifted | Check zero before and after |
| Dirty/scratched faces | Reads high / erratic | Clean; recalibrate or repair if scratched |
| Temperature | Micron-level error | 20°C reference; avoid long gripping |
| Frame flex | Error at deep positions | Don't force it in an awkward posture |
Care
- After use, wipe the faces and apply a light rust-preventive oil. For long storage, leave the anvil and spindle slightly open (to prevent condensation and seizing).
- Never drop it. Calibrate periodically against the standard bar or gauge blocks.
Micrometer vs. caliper
| Item | Micrometer | Caliper |
|---|---|---|
| Resolution | 0.01 (est. 0.001) mm | 0.05 / 0.02mm |
| Accuracy | High (satisfies the Abbe principle) | Medium |
| Measures | 25mm steps, mainly OD | OD, ID, depth, steps |
| Use for | Tight-tolerance dimensions | Quick checks |
Frequently asked questions (FAQ)
Q. Must I use the ratchet? A. Yes. It's the key to a constant measuring force. Turning the thimble directly is too strong and reads low.
Q. Can it really read 0.001mm? A. Models with a vernier on the sleeve read 0.001mm rather than estimating it.
Q. How do I zero outside the 0–25mm range? A. Use the supplied standard bar to set zero. Without it you can't measure accurately.
Q. Can it measure inside diameters? A. Not with an outside micrometer. Use an inside micrometer or a bore (cylinder) gauge.
Q. Shouldn't I close the faces for storage? A. Closing them tight invites condensation and seizing. Leave them slightly open.
Summary
Read a micrometer as "sleeve (0.5mm) + thimble (0.01mm)," and the key to accuracy is using the ratchet for a constant force. Make checking zero before/after and controlling temperature a habit, and you'll measure even tight tolerances reliably.
Sontis Management keeps measurement and inspection results together with materials, quotes and orders. Try it on the free plan.
Manage quotes & inventory — free, starting today.
No credit card · 5 minutes to start. Management software for machine shops.
Start for free