How to Use a Bore (Cylinder) Gauge【Inside-Diameter Procedure with Diagrams】
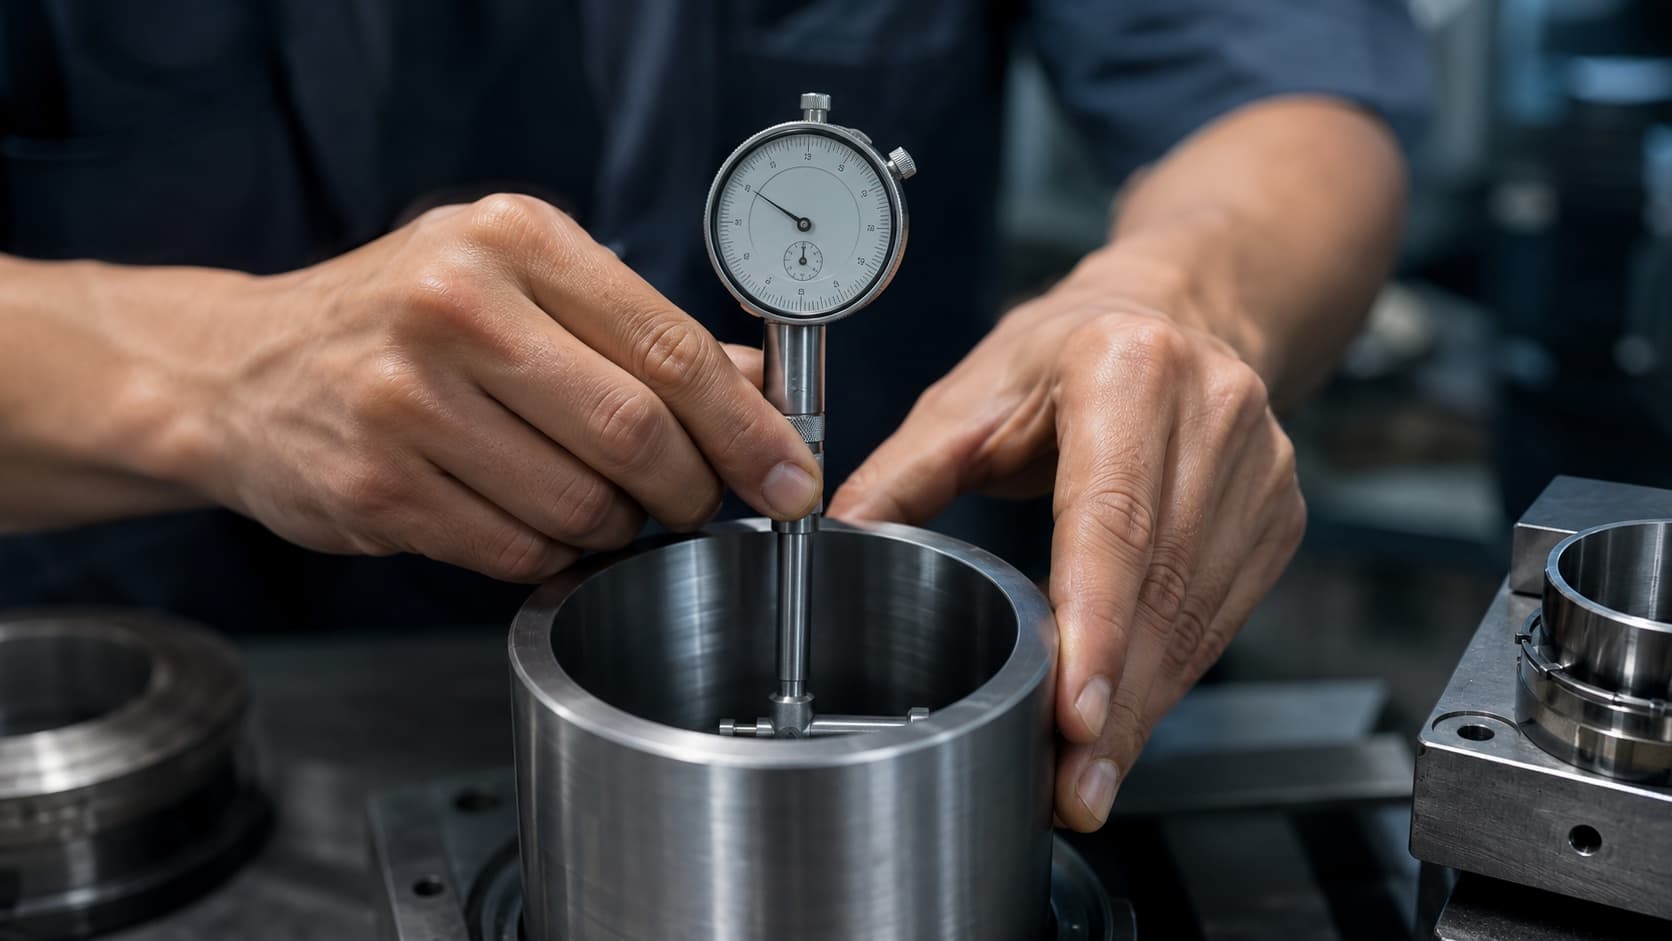
A bore (cylinder) gauge is a comparative instrument for measuring inside diameters with high accuracy. It doesn't read an absolute value directly — instead you set zero against a reference and read the difference from it on a dial indicator. One gauge covers many diameters by swapping replacement rods. This guide covers the components, setting zero, the rocking procedure to read the minimum, and checking roundness — with diagrams.
What it measures
- The inside diameter of a hole (absolute value = reference + difference).
- Measuring several points by depth and around the circumference reveals roundness and taper.
- More accurate than a caliper's inside jaws, and stable even in deep bores.
Components
- Body (stem): the tube you insert into the bore, with the contact point and guide plate at the tip.
- Dial indicator: shows the difference from the reference in 0.01mm/0.001mm.
- Replacement rod (anvil): swapped to match the diameter being measured.
- Guide plate (centralizer): guides the contact point onto the true diameter line of the bore.
Step 1: Choose the replacement rod
Pick the rod and spacer washer that match the bore, assembled so the moving contact travels near the middle of its range. At the ends of the travel you can't read correctly.
Step 2: Set zero (the most important step)
Set the needle to 0 at the reference size. Two references are common:
- With a micrometer: set an outside micrometer to the target ID, insert the contact between the faces, and turn the bezel so the minimum value while rocking reads 0.
- With a ring gauge: insert into a known-ID ring gauge and take zero (the most reliable).
Return to the reference before and after measuring to check for zero drift.
Step 3: Insert and rock
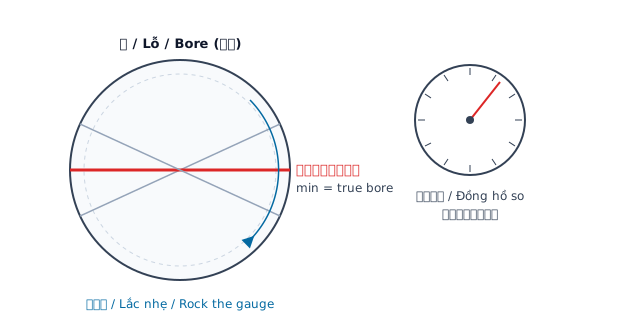
Fig. 1 — The rocking principle. If the contact touches at an angle it reads longer (larger) than the diameter. Rock the gauge gently back-and-forth and side-to-side; the needle sweeps and shows a turning point = the minimum. That minimum is the instant the contact crosses the true diameter of the bore — the true inside diameter.
Step 4: Read the minimum
Read the turning point (minimum) while rocking, then add/subtract the difference to the reference size. Example: zero on a φ20.000 ring gauge; the bore's minimum reads +0.012 → inside diameter 20.012mm.
Checking roundness and taper
- Roundness: measure several points at the same depth but different angles; look at max − min.
- Taper: measure at the entrance, middle and bottom to see the diameter change with depth.
- Multiple points reveal distortion a single reading would miss.
Common errors and fixes
| Cause | Symptom | Fix |
|---|---|---|
| Poor zero set | Whole scale off | Zero carefully against the reference; check before/after |
| Insufficient rocking | Reads high | Always rock and read the minimum (turning point) |
| Wrong rod choice | Inaccurate at travel ends | Choose a combination with travel in the middle |
| Temperature / hand heat | Micron-level error | 20°C reference; avoid long gripping |
| Worn guide plate | Misses the diameter line | Inspect and replace |
Care
- After use, wipe the contact and stem and protect against rust. Store rods as a set.
- Avoid drops and impacts. Calibrate periodically against a ring gauge or gauge blocks.
Compared with other bore tools
| Tool | Accuracy | Character |
|---|---|---|
| Caliper (inside jaws) | Medium | Fast, for shallow bores, medium accuracy |
| Inside micrometer | High | Reads the absolute value directly |
| Bore (cylinder) gauge | High | Comparative; strong for deep bores and roundness checks |
Frequently asked questions (FAQ)
Q. Why can't it read the absolute value directly? A. Because it's a comparative instrument. Zeroing against a reference and reading the difference is what gives its high accuracy.
Q. Micrometer or ring gauge for zeroing? A. A ring gauge is most reliable. Use an outside micrometer when you don't have one.
Q. When rocking, is it the maximum or minimum? A. The minimum (turning point) is the true diameter. An angled contact always reads high.
Q. How accurate is it? A. It depends on the indicator's resolution (0.01/0.001mm) and calibration state. Calibration is everything.
Q. Can it measure a tapered bore? A. Measuring at several depths captures the diameter change (taper).
Summary
A bore gauge is a comparative tool: "zero against a reference → rock inside the bore → read the minimum." Zeroing decides all of the accuracy, and you must always rock to read the turning point (minimum). It excels in deep bores and roundness/taper checks and is the workhorse for inside-diameter measurement.
Sontis Management keeps measurement and inspection results together with materials, quotes and orders. Try it on the free plan.
Manage quotes & inventory — free, starting today.
No credit card · 5 minutes to start. Management software for machine shops.
Start for free